Search This Blog

Sunday, February 6, 2011

Old School Nintendo Cake: Happy Birthday Joe!


This past Friday was my bother Joe's birthday, and he is a huge fan of Nintendo- mostly all the old original NES games, so I wanted to do a NES theme- with limited time to do it I figured the game system and a few accessories would make a nice cake- I originally had hopes of sticking a few Nintendo characters on the cake too- but not enough time.

I started by baking a chocolate sheet cake, which I cut in half and stacked, layering with ganache:
Then it was time to carve. I traced the shape of the console and made some cardboard templates- which I trimmed an eighth inch off of all sides to allow for the fondant. I used a cereal box for the template, and the shiny printed side was nice for not sticking to the cake. I attached a template to each side with a little ganache and started carving:

Then I covered the entire thing with ganache:
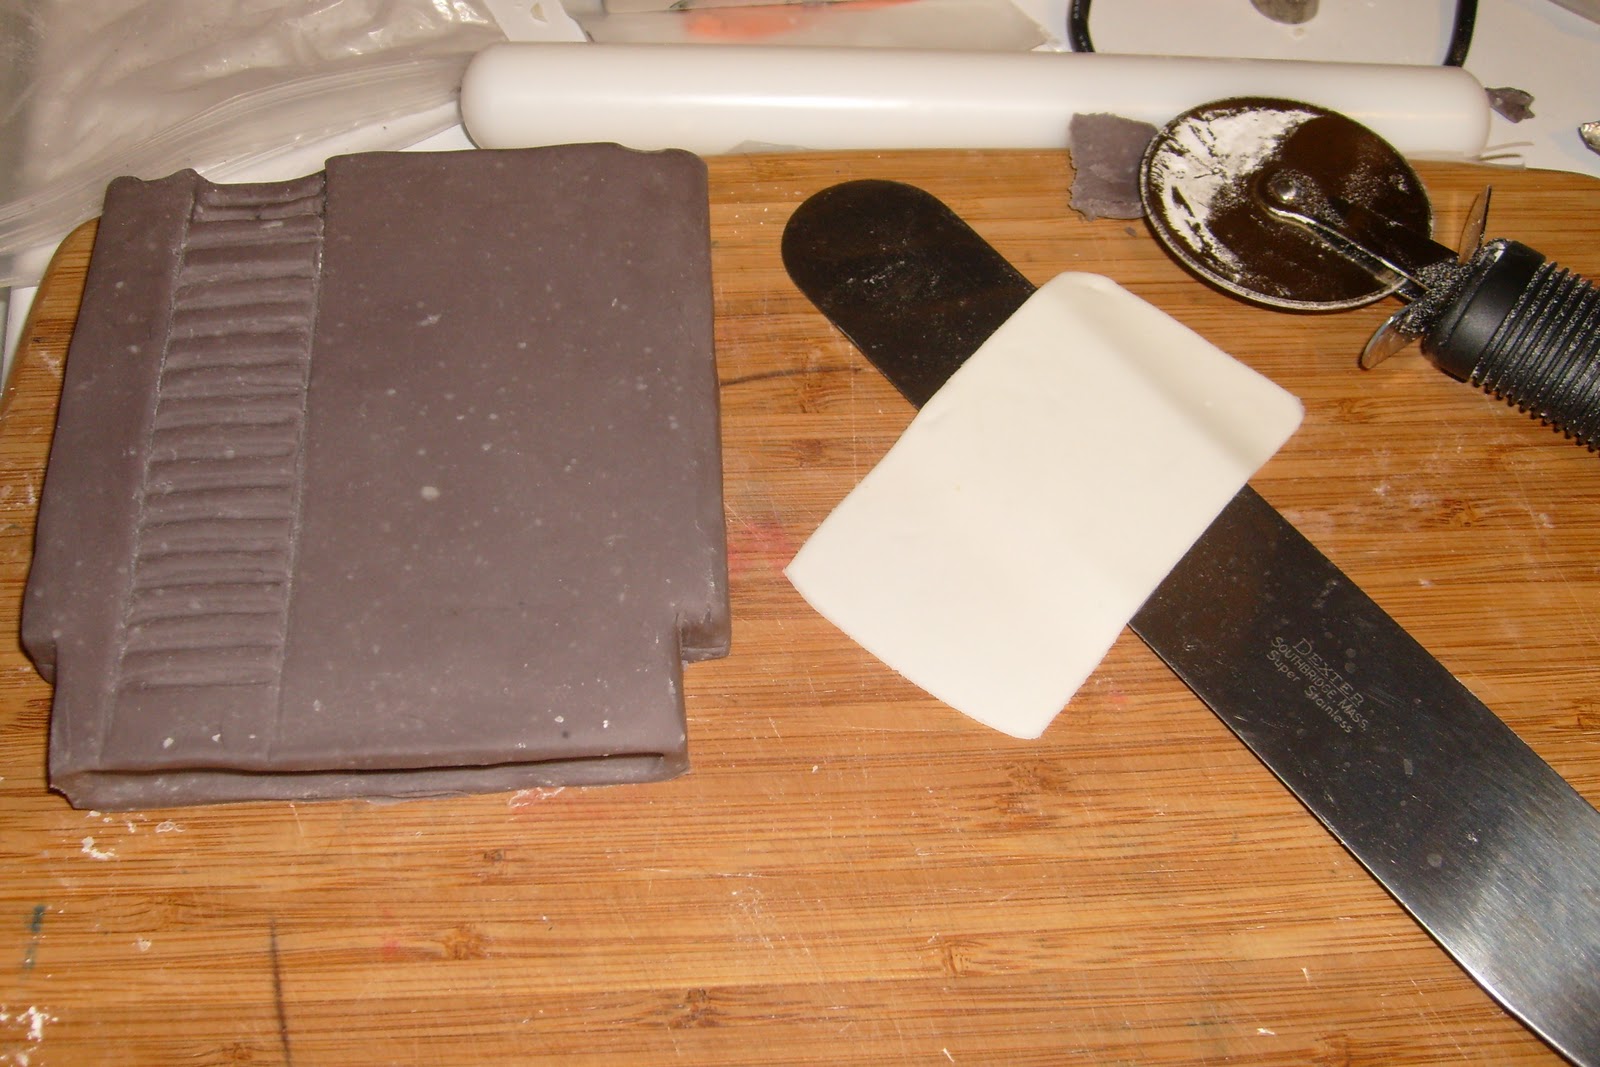
I didn't want to put the fondant on too early, as I 'd be leaving it out of the fridge after that, so I moved onto the accessories. I used modeling chocolate for the controller and game cartridge:


For the label of the cartridge and the top of the controller I made a waxed paper outline, and then rolled some fondant as thin as possible so I could paint on top (modeling chocolate usually resists painting with food color)


For the controller, I also added modeling chocolate details for the arrows and buttons: I painted the black and grey on top of the fondant and then left it overnight before attempting to paint the Nintendo logo and words with red to avoid bleeding
I rubbed a little shortening over the carved cake and started covering with fondant, which did not drape as well as I had hoped. I started with the lighter-colored top first (I colored my fondant the night before so it could rest before applying- it's usually a little harder to deal with if you try to color it and then apply right away, in my experience)
I trimmed away the excess and added the darker grey in pieces around the bottom, pinching the seams together. I have read about blending seams in fondant by just rubbing with a little shortening, but I've never had success and usually end up with shiny seams )

I added some modeling chocolate details:

I then finished painting on the controllers (which didn't show up well- the black kept absorbing the red)

I rolled a long rope for the cord- I got it as thin as I could before it started breaking


I used gumpaste tools to press the ridges in the top of the unit, and inlaid black modeling chocolate for the plug-ins


And the two side-by-side:

I am my own worst critic of course, so all I could see were the fondant imperfections and grainy lumps in the modeling chocolate, but my brother like his cake (and actually asked how long it would last if it didn't get cut) so that is all that matters

Wednesday, January 19, 2011

Habanero Pork Roast / Cupcake the Elephant Dog

Well know that I'm back in the working world, I'm going to have to turn more often to my old friend (or in my case friends, as I have 3 sizes) the slowcooker. For this blog post I was inspired to modify a recipe from Better Homes and Gardens Low-Carb Slow Cooker Cookbook. The original recipe was for an Apricot-glazed pork roast with apricot jelly, which I modified for what I had in my fridge.


For my version you'll need:

1.5-2 pound pork roast (mine was a sirloin roast, but shoulder would work too)
Habanero Jelly (5.5 oz or whatever size you can find)
1 red onion, chopped
2 Tbs. Cranberry Mustard
1 orange

First, mix together in a bowl the onion, jelly, juice of the orange and mustard


Then trim the fat from your pork roast and put it in your crockpot (I always coat with a little cooking spray for easier clean up)

Then spoon the mixture over the pork. I put it in the fridge as is to start in the a.m.; but you can just cook from this point, 5-6 hours and high or 10-12 on low
Final Result:

It was nice and fall apart tender and juicy- but I was a little underwhelmed by the habanero flavor- I was hoping for a little more zip- would be yummy tossed with a spicy, fruity bbq sauce though

And now for something completely different:

My poor cupcake woke up looking like the elephant man. Her cute turkey waddle under the neck has ballooned to a bullfrog-like bulge. The vet didn't know exactly what's goin on, but thought it was just an infection with some inflammation and sent her home with some antibiotics- my poor deformed looking baby- reminds me of the Seinfeld episode with the goiter lady


Her mood seems good- just a little more lazy (I didn't think that was even possible:P) so hopefully she'll be on the mend soon

Monday, January 10, 2011

Dueling Cookbooks: French Macarons, Alice Medrich and Fiona Cairns

So I've been seeing these french macarons around the world wide interwebs for awhile now, and finally had to see what all the fuss was about. I decided to play dueling cookbooks and used recipes from two different books: Alice Medrich's "Chewy, Gooey, Crispy, Crunchy Melt-In-Your-Mouth-Cookies", and Fiona Cairn's "Bake and Decorate"


French macarons are basically a meringue with almond meal added. The almond meal is very pricey-$10 for a 1 pound bag. That was really hard for my cheap self to place in the shopping cart:)
The recipes were very similar, but had some differences in ingredients and technique. First up: Alice Medrich's Recipe

First, the almond meal and powdered sugar are mixed together, and then go through a strainer to aerate
I wanted to try the coffee-flavored variety, so I added some coffee powder to the dry ingredients. I only had regular instant coffee, which didn't dissolve much- next time I will definitely use espresso powder.


The egg whites and food color get whipped to stiff peaks. Well, that was what the recipe said: mine just turned into a foamy blobby shape:


Said Foamy blob:

Not sure if I just overbeat? Then the almond meal gets folded into the whipped egg whites:


I was a little nervous at this point that I had failed, since it was kind of a lumpy-looking mess; but as the ingredients were quite expensive I persevered on and put the mixture in a pastry bag and piped it onto parchment-lined cookie sheets:


Then the macarons "rest" for 20-30 minutes before going into the oven. In this recipe, the macarons go into a pre-heated 400 degree oven, which is immediately turned down to 300- the quick blast of 400 is supposed to help give the macaron a "foot" or platform- a desirable macaron quality apparently:P


Then the filling:Nutella:) I try not to buy Nutella too often as I have the tendency to eat it straight from the jar. The flavor combo was soooo good!


Now time for Fiona Cairn's recipe. In her version, the powdered sugar is sifted, and then the almond meal mixed in.

Then the egg whites get whipped with the food color. Note to self- in future use a LOT more food color to get the garish macaron colors you see in pictures (usually I don't like to go overboard on food color in baked goods- but something about those bright, bright cookies makes me smile:)

Cairn's recipe differs from Medrichs as it uses a little superfine sugar with the egg whites. (I don't have superfine sugar in my kitchen, so I just put some for a spin in my coffee grinder and Voila! superfine sugar)


Then, the almond mixture is folded in, and piped onto the prepared pans:


Let rest for 20-30 minutes. The baking instructions also differ a bit from the other recipe. In this recipe, the oven is pre-heated to 325 degrees, and baked with the door slightly ajar- she recommends putting a wooden spoon handle in the door.


The Cairn's recipe gives guidelines for different floral fillings: lavender, rose water, and orange flower. I tried the lavender. It is basically a white chocolate ganache, but the cream is first heated, then dried lavender is stirred in and steeps for 30 minutes to add flavor. It smelled so good in my kitchen:)


Very yummy, although the 1/3 cup cream to 3 ounce of white chocolate ratio is too runny. It also makes waaay more than needed. I was going to try and make a truffle with it, but managed to drop the bowl on my kitchen floor:(

The verdict? Both were delicious. I'd say the Medrich recipe is a little easier - no messing with superfine sugar- just the powdered, and turning the oven down seems better to me than leaving the door slightly open. Only the coffee macarons had the coveted "foot" but I'm not sure if that was because I erred on the side of under-beating the eggs since I feared I had overbeat the first ones. Both books are excellent and I can't wait to try more recipes from both.


Can't wait to make more varieties- the lemon flavor with lemon curd filling and cocoa flavored with ganache filling from Alice Medrich sound divine, as does the rose-water filling :)from Fiona Cairns

And I leave you with some cuteness to go with the sweetness:)